My mom used to make yogurt when I was a kid. My mom used to be a hippie. I never bothered or even thought about it again until I was in the Peace Corps in Botswana. I had refrigeration, but I did not have regular access to a store. I could buy the milk that lasted forever not in the fridge, and make yogurt out of it because I could rarely buy yogurt. In Guyana, it was also rare to find plain yogurt without added color and other horrible stuff. I could get amazing, fresh, whole milk from the market though, which I trusted much more than the radiated stuff from the store, so I started making yogurt again. Now, I am back in the US, but as my aunt, with whom I live pointed out, plastic yogurt containers are really an environmental disaster, and they are unnecessary. We can buy local, organic milk in glass bottles that we return and make our own yogurt. How? You ask. It is so simple! I will show you in just a minute.
We top our fresh yogurt with homemade granola, which she taught me how to make. Mine had never come out well before, but it really is not difficult once you know the tricks! Store bought granola is pretty expensive, may have ingredients you don’t want and also uses packaging that ends up in the trash or recycling bin.
I will start with the yogurt because really, it could not be easier! One caveat: you do need to have yogurt to make yogurt. In Botswana and Guyana, I would buy a big container of it when I could find it; that would last me through weeks of yogurt making. You can do that, or you can buy a single serve cup of it each time you want to make a batch, although both of those options continue to use plastic. I suggest buying packaged yogurt starter. It is in a powdered form; and can be bought at healthy food stores and on-line. Use that for the first batch, and then you can use the yogurt you make for the next 2-4 times. You will just save a 1/2 cup each time you make it to start the next batch. After a few times, it will tend to taste sour, so you need to start with a packet of starter again. I’ll explain more as we go.
HOMEMADE YOGURT
Prep time: 5 min
Cook time: 15-20 min
Rest time: 20-30 min
Rest time: 8-12 hours
INGREDIENTS
1 gallon (or you can just do a half gallon) milk*
1/2 cup plain yogurt per gallon of milk or yogurt starter (read the package to determine how much)
1/2 cup powdered milk (this is optional, but especially if you are using skim milk, does help to make it creamier.
*NOTE: Any fat content milk is fine. Skim will tend to make thinner yogurt, but it is fine to use. Whole will be the creamiest!
INSTRUCTIONS
Take your high-quality, organic, grass-fed-cow milk and pour it into a pan, and turn the heat under it on pretty low. It will take longer to heat, but you don’t want to burn it, so keep the heat on medium-low to low. Heat, stirring occasionally to keep it from burning to the bottom until it reaches 180 degrees Fahrenheit. This is not boiling, but it will be frothy, and it will be hot. I suggest actually checking the temperature for best results. The purpose of this is to kill any bacteria in the milk. This is especially important if, like me in Guyana, you are using fresh milk that has not been Pasteurized. You need warm milk to make yogurt anyway, so even if you are using ultra-Pasteurized milk, go ahead and heat it.

At some point while it is cooking, add the powdered milk to it if you choose to. Stir it in.

Once it comes to 180 degrees, turn off the heat.

Next, you need to cool it. If you put yogurt starter in hot milk you will kill the yogurt bacteria, and you will end up with sour milk not yogurt! You can just leave it out on the counter to cool, or you can put the pan in a cool water bath, but that usually causes me to cool it too much, so check the temperature regularly. You want it to be 118 degrees Fahrenheit. This is warmer than skin temperature, so it will feel hotter than say milk you would give a baby. Again, I recommend using a thermometer. I did it for years without, but it was always hit or miss!
Once you get to 118 degrees, add the yogurt or yogurt starter and whisk it in.

Then pour it into something you can cover. We use a plastic container that then sits inside styrofoam to keep it warm. In a warm climate, you can just leave it out on the counter. You can also just wrap it in some blankets to keep it warm or put it in a cooler, which in this case, will act as a keep-warmer! If you want individual containers, pour it into to empty yogurt cups, or I used to use jam jars. Whatever you use, I recommend pouring some boiling water in them and rinsing them out with that to sterilize them. Then let them dry before pouring your milk in to them.

Basically, you want your warm milk to be covered and you want it to stay warm.

Now it needs to sit. Eight hours minimum, but I get the thickest yogurt when I let it sit for twelve. Make it in the evening, and you will have yogurt in the morning!

Give it a stir (if it is a little chunky, that’s okay, just whisk it up!) and then take out a 1/2 cup of it to use as your starter for next time.

As I said, you can do that a few times before you need to use fresh starter.
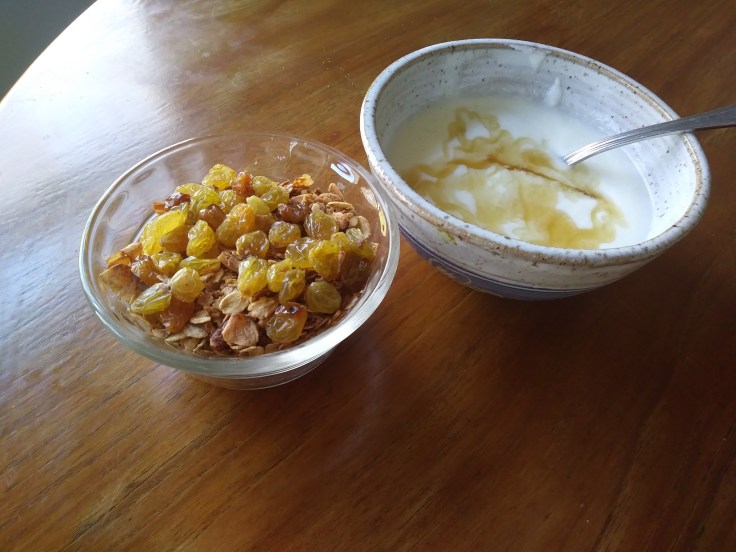
Top with granola and you are good to go! You can also use this in smoothies, eat it as is or topped with fruit, honey or jam. It’s your yogurt, do what you like!
HOMEMADE COCO-NUTTY GRANOLA
Prep time: 10 min
Cook time: 60-90 min
Rest time: 1 hour

INGREDIENTS
3 lbs whole, rolled, organic oats
2 cups chopped nuts (almonds, pecans, walnuts or any combination)
3 cups dried coconut (I get this stuff that is shaved. Don’t use the sweetened kind unless you like really sweet granola!)
1 cup canola oil (or other vegetable oil)
1/2 cup coconut oil
1/2 cup honey
1/2 cup maple syrup
2 T vanilla
2 T cinnamon
1/4 t salt
*You can add other flavors or substitute other oils and sweeteners. Reducing the quantities of “gooey stuff” will result in less crunchy granola, but experiment with the flavors!
INSTRUCTIONS
Heat the oven to 250 degrees. Hotter will go faster, but you will burn your oats.


Toss the oats, nuts and coconut together.
In a separate bowl combine the salt, cinnamon and all of the wet ingredients.
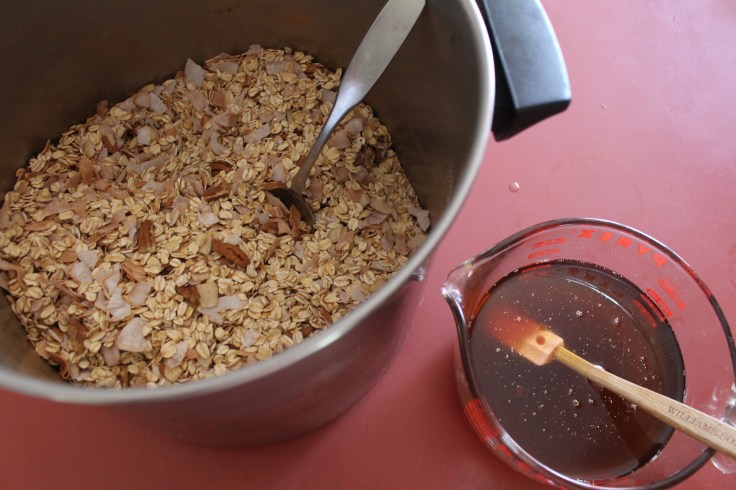
This mixture may need to be warmed, so you can either heat it gently in a pan or microwave just to get it warm, so that it is nice and runny.
Pour the gooey mixture over the oats mixture and get the oats well covered.
Put the granola into shallow pans and spread it out, so it is no more than about 1/2- 1 inch deep. Put it your warm oven.
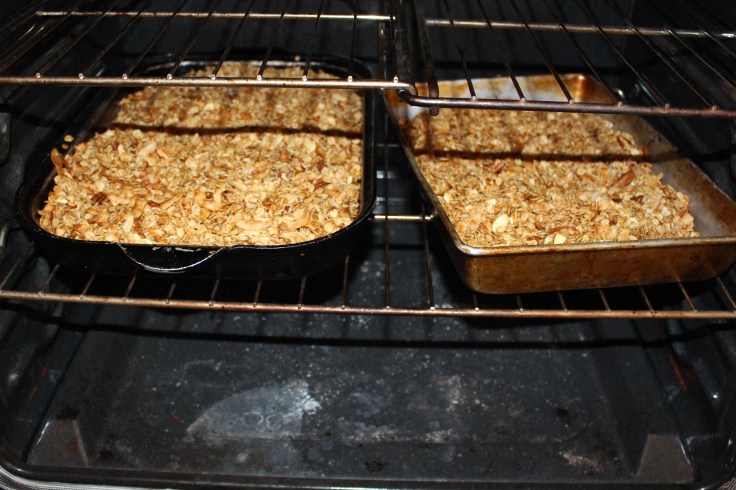
You need to stir it every 15 minutes, and I like to rotate the pans around for even cooking. Keep stirring and rotating every 15 minutes until it is a golden brown. It won’t be crunchy yet; it will be deep golden in color, but not burnt. This will take anywhere from 60-90 minutes depending on your oven and your preference.

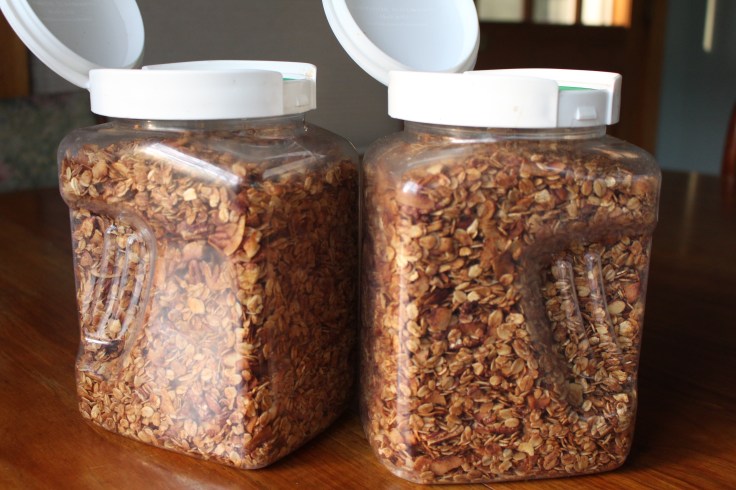
Let it cool before transferring it to airtight containers. It will last for a couple of weeks like that, which is why we make big batches in our house.
(I like raisins in my granola, but I add them after. They just turn too hard in the oven.)
I also like to drizzle some honey or use jam to sweeten the yogurt.
Enjoy!